In this way you don’t have ruin precious captures with inappropriate text – you can put the date on the photo just before print using the EXIF information.
![](https://blogger.googleusercontent.com/img/b/R29vZ2xl/AVvXsEikFvU16F_aC4ktQ2LgwuYs9fdwed1PXnVkkya5L3AEgItQYmXnCKGQzOsWdYjnMaRWOIXrEI7WHg1UfwMbGPWZhEKiN1UMR2eqfUPDkxkTWkUeF2i-fQdZune8bp-_GmxSjayXFg/s400/i01.png)
Putting the date on big number of photos may be a tedious job if you are using a classic photo editor. Read forward to see how you can automate this job using a small tool.
Step 1. Download EyeBatch software.
Step 2. Select your pictures
![Click to zoom](https://blogger.googleusercontent.com/img/b/R29vZ2xl/AVvXsEjy_CiKIajjClYHU5ZSw96zOv7rBKKdS2uJdEnDK-346HShud4dz17uBCUz5vPNoUp_hVXxV_v6Z6zKhDeDXHEcGScbd2Dl89ZFdJ2fEB5pHF3dawlEGIkGPglSwtPlfy9q7sjZkg/s400/i02.png)
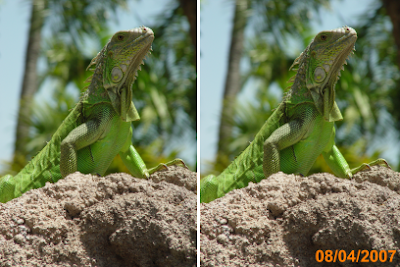
Step 3. From available commands list select Text Watermark and adjust various parameters according to your taste
![Click to zoom](https://blogger.googleusercontent.com/img/b/R29vZ2xl/AVvXsEi3sdr-mjVjq90oers0x3pFjM8fZ1qtQInhfQV5xawUeE-_bFBOfrUuelJyMXL24LAPw2mlsJNEk7Ic8goL07nPZEVMWP3j9YJqrlMDclBab0BBXMz4olSBJiuv2QfiNPjy26SDdQ/s400/i03.png)
Step 4. Select also Save to File command and make sure you specify where to place the output files
![Click to zoom](https://blogger.googleusercontent.com/img/b/R29vZ2xl/AVvXsEhrlGGBr61i9zQzwF0Z4hM5Q3x8GTePP1pyPcCijkmXurwmksnlLVZLOn6KjaMMSI9B2b55hoTNvfR7Dd5ZO_tAspFugJRYnPWAdp7U8jqeZqLWrewj-uhOwoBjaz7R51bCX6dLbw/s400/i04.png)
Step 5. Click Process button and wait.
![Click to zoom](https://blogger.googleusercontent.com/img/b/R29vZ2xl/AVvXsEiAgxVNh5_FsHyjWB0CVIolxqjy_-YzdmD8VzTw3DMs9Tt3R6HcZBjMsGWLLVn8-Kp0PWipbR71baFmGOX1MG7Hi3SV7H28ZUU8sVNnTEN4CuYsFG0NRfWkuIQ0eDIvBwkA0X5blw/s400/i05.png)
No comments:
Post a Comment