Step 1. Download YPOPs!. This is an application which emulates a POP3/SMTP mail server and provides free POP3 and SMTP access to Yahoo! Mail. It does not depend on Yahoo's POP3/SMTP mail server.
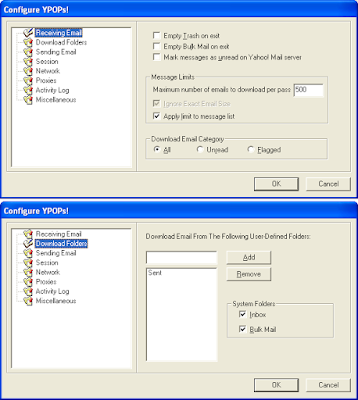
Step 2. Install downloaded application and take a look at its settings. Normally you don’t have too much to configure here.
![](https://blogger.googleusercontent.com/img/b/R29vZ2xl/AVvXsEgppx64nNR6s62djLMyz5HFc830MWDAb36kOZ0Z_9cj4100feyvNjb9O9h9d7AWHqXJgkwSjKehdrVQqSAqMJl4fNzHPJcMK3q8UAHuH4E40gqIoFHYXqFjzkV9P0GgsL6sme4WSA/s400/i01.png)
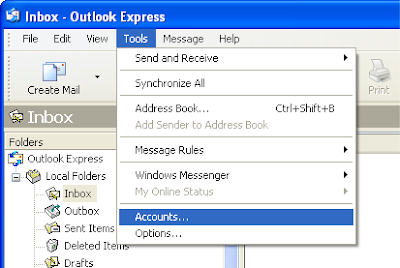
Step 3. Start Outlook Express and go to Accounts menu
![](https://blogger.googleusercontent.com/img/b/R29vZ2xl/AVvXsEj3LdWe1tH5GuyoB9X7tF6ppB5mx9JWugswkY4OkIUY14pShoj1unMkpbQ3bFoN0qOWSCn8PFuMOzvOSlS59U_GACOqEHpK6ppVp5js_RnIC09B0DeEzB1GNZpzhd1l56q4L3gYUA/s400/i02.png)
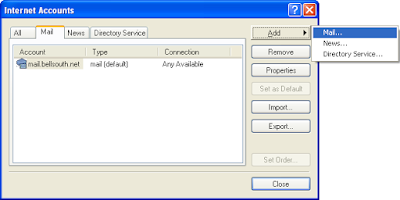
Step 4. In the window that opens, click the Add button to add a new mail account. Depending on your configuration you may already have some predefined accounts.
![](https://blogger.googleusercontent.com/img/b/R29vZ2xl/AVvXsEhZM1-m0lfUuBMTYiVfmGERXTRBTQAXK0MnMXqM2rm_yiK-7TJf4KrfsDOKwyCQe6ZiglYb53ycyS0WldguyU8v3PijqAg2E1IImyOFH9hUI4VW9HVo16gYnvGIKBuFeNQuPCHH3Q/s400/i03.png)
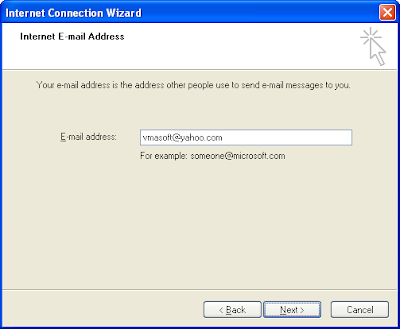
Step 5. A wizard will guide you through the account setup procedure
![](https://blogger.googleusercontent.com/img/b/R29vZ2xl/AVvXsEgvoI747JtprdFJc9stLwC75NPe-P3UI_7vKinEcWIxokNtaYtmHUR45PTk-qwxF-oGV6LmNu3om8wzwIBV2qWLV5I30sIwVKoSM1NdYZ7caGPP85n0HgcgDXYrZacZE7qvyQDpFg/s400/i04.png)
Step 6. Specify your Yahoo email address
![](https://blogger.googleusercontent.com/img/b/R29vZ2xl/AVvXsEixz1EwG2IHFHiP1XHi4dRlNYsAIoXnhiOXApDEhVnPfZT8dNEvXf96skT0mF1JxB87br4VAvA8iv3aKXauw9snTULrEiVVh3ft8pNnzrpVxKHgQN7l2Nm1nXZ0W91o8B2KIzXbiw/s400/i05.png)
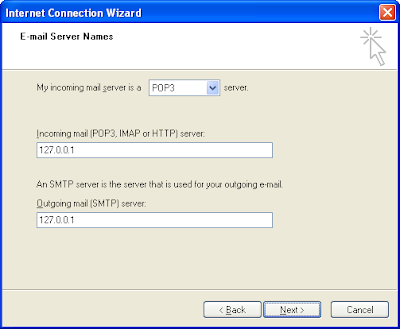
Step 7. Specify 127.0.0.1 as your POP3 and SMTP server. This is your local address where YPOPS application is installed.
![](https://blogger.googleusercontent.com/img/b/R29vZ2xl/AVvXsEiIg0inLV_Eq5ODdZ-xE_8BSq7D9aT3iSnDmN5EA0zCc5euJD2SqKYDBM5TMyGH_5jBtApwdImaBP2ukqkOEVs_GKOntE0H6x4_Ybm1NRJkxKimdQtwBmS_fCoBs1y8vynfwYm3CQ/s400/i06.png)
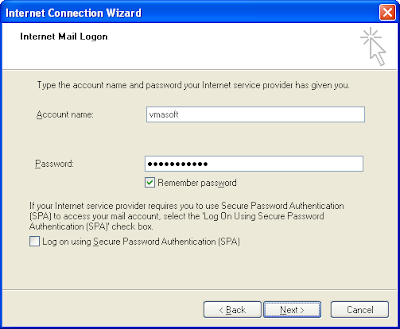
Step 8. Specify your Yahoo username and password
![](https://blogger.googleusercontent.com/img/b/R29vZ2xl/AVvXsEhz5qzvgyn6EzzwWdG8GQC02a2vq-g5HpIrUeG5uxoRj6ZRBmkkaLtJTbvZTVWeBzyydNXVD3lXs2Uf59Z3emn6MWPspVVExXIcjWawslzlLnAvfOgB9m-M0NoldeE6UoOuOJfGlQ/s400/i07.png)
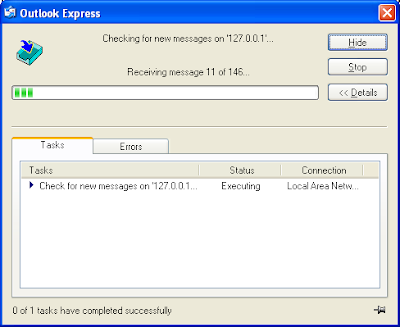
Step 9. Press Send/Receive button and see how messages are downloaded
![](https://blogger.googleusercontent.com/img/b/R29vZ2xl/AVvXsEj6dP7f42Of_eO4O3qoG7gnOduHkeChhc4O23abKFywZrorKvUm6vv9v_XOVzFwoTJsq3aWZMZvlQIkFv7Hgk__TIJcziF1-HgQnGGY_uBD2s4rktzdNwlGG0N8hzhyphenhyphen1r5z0dhGJQ/s400/i08.png)
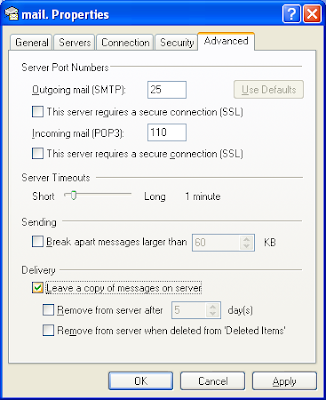
Step 10. This step is optional. If you don’t want to delete the messages from the online Yahoo mailbox, go into account properties and check “Leave a copy of messages on server.”
![](https://blogger.googleusercontent.com/img/b/R29vZ2xl/AVvXsEiFF0rCZ33l3vJhUrM6oumCSpWl6KB1m36B0XuJ0ItPzhfPljvhfzbWceoF3s6KkjW8esL5iYXI3OxqQzVRDTsm7N9Cxw2oju5UM9VRdkpk2Bn8f6GxMR6GNVdeOtxMEbKMOXA9_w/s400/i09.png)
That’s all! Comments welcomed!
No comments:
Post a Comment